My closet is a space I’ve been dying to get my hands on. Like most people, I have to pace my decorating projects, so I’ve waited 4 long years to tackle this “room”.
I don’t know quite what it was that made that day “the day”, but a couple months ago I walked into my closet and decided it was time.
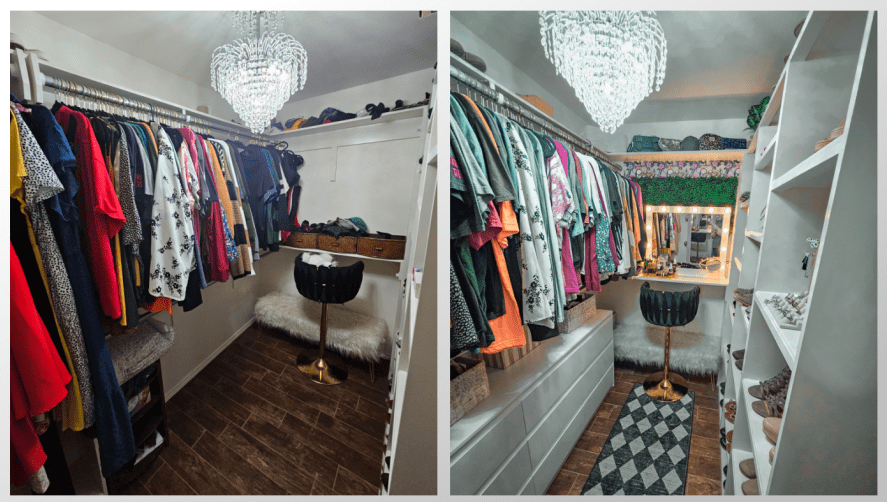
My starting point was a mess; clothes thrown in drawers that were sitting on shelf, hats tossed in a pile, and jewelry mostly tangled in boxes.
But thankfully I did have a gorgeous canvas to work with, and I had a vision considering I’ve been thinking about it for so long.
The goal was to create something organized, unique to my personality, and an all-in-one “getting ready” space. I wanted it to feel like I was in “The Princess Diaries”.

STEP ONE | Inventory and Measurements:
The first step I took in this closet re-organization and makeover was to take inventory of the “categories” I was looking to organize, and quantity of each article.
To do this I grabbed a notepad, stood in my closet, and went around the room visually first to categorize. To categorize I made a mental note of what I owned (like-items) and where I thought they would be most appropriate to store.
Dresser Items:
- Jeans
- Intimates
- Socks
- Athletic Clothes (Leggings/Shirts)
- Sleeping Shorts
- Pajamas
- Slacks
- Swimsuits
- Hats/Scarves/Belts
- Costume Accessories (Wig, Tiaras, etc.)
Built-in-Cubbies Items:
- Shoes
- Jewelry
- Formal Dresses
Once I had an idea of what all types of items would fit well in the same drawer or cubby and had a mental note, I started measuring the width, depth, and height of all the shoe cubbies and sections of closet and wrote them in the same notebook.
At this stage I also counted the number of pairs of shoes I owned, number of clutches, number of formal dresses, and hangers needed to have all-matching hangers.
STEP TWO | Visualizing, Planning, and Purchasing:
As an Amazon Associate I earn from qualifying purchases
With my measurements and “inventory” in hand, I started searching online for organization solutions. First on the list was a dresser. I knew I wanted this along the bottom section of the longest wall. I searched for a 12 drawer dresser (based on my categories), but ultimately the best fit, color, and quality I found was a 9 drawer dresser that was white, spacious inside, and priced just right for my budget.
I wanted to start with “function” because those tend to be less emotionally driven choices and therefore are a bit easier to land on, so next I purchased velvet hangers all in the same body and hook color for uniformity in the closet. I also ordered dress bags for all my formal dresses, and I chose to order them all in the same long size, even for the shorter gowns for the same reason, uniformity.
Because I didn’t end up with enough drawers I decided to purchase some decorative baskets to sit on top of the dresser and hold the remaining items. I only own 2 swimsuits, so I chose a small basket to hold those for the middle section of the dresser. For either side of that I chose 2 whitewashed woven baskets that were larger- one to hold hats (of which I have quite a bit) and the other for belts and scarves. I ended up choosing to purchase a fourth basket to hold items from old costumes (wigs, tiaras, etc.). For that one I decided I’d put it up in the top of the closet, so I chose a large pink basket for the first pop of color.

Next was jewelry organization. I knew I wanted everything displayed, easy to see, and easy to grab. This would make accessorizing an outfit much simpler and more fun. I already owned one carousel style earing holder, and I used that to hold all of my earring with hook-style backs, but I still needed an option for my generic-back earrings. So I counted how many I had, and found 2 necklace displays that side, by side, would hold all of my necklaces and remainder of my earrings perfectly.

I also chose a ring display that would fit my rings with minimal doubling-up.
I wanted to display my favorite necklaces as a highlight in the closet. These necklaces were too complex to hide away on the other necklace organizers, so I searched for displays specifically for this purpose.

Because one set had earrings that went with it and was a lighter color set, I chose a black necklace with earring display to hold that one and white displays for the two darker necklaces.

The last step in the jewelry-saga was bracelets and watches. I chose a 3-tier bracelet display rack to hold all of these items.

With jewelry organization and display choices complete, I moved on to the wallpaper that I wanted to display on the walls inside all of the cubbies. The cubbies built in to this closet were all difference sizes, with the measurements I took earlier I realized I could get away with using sample sheets of wallpaper from Spoonflower.
I chose the PERFECT wallpaper for this project. It was colorful, pretty for a closet, but had edge to it with skeletons, ravens, octopi, etc. I fell in LOVE with this wallpaper. I counted the number of cubbies, and purchased one sample sheet per cubby and a couple extra sheets for the trim.
The wallpaper helped shape the rest of the closet, in that, it determined the color scheme I’d work with to complete the project. The next most simple area to focus was the wall behind the door, where I wanted to put a full length mirror. With the colors chosen, I decided on a pink framed mirror with a rounded top.

This is a large closet and I don’t own enough clothes to fill every single rack that was built in (originally all of the non-cubby spaces were built for racks), and I desperately wanted to add a makeup station INSIDE the closet. So the next step was to turn my attention to the wall opposite the mirror and start working on that station.
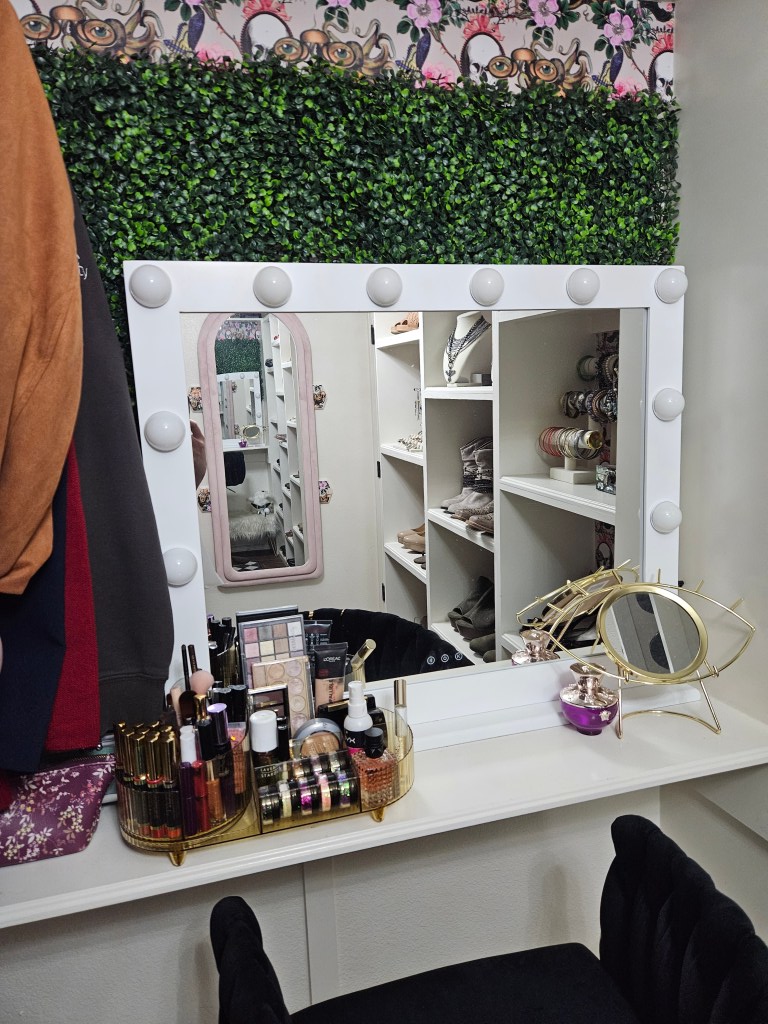
Now mind you, I don’t do much makeup. I just don’t know how, so for me it wasn’t going to take much organization to fit what I owned. I chose one small organizer for my makeup, a vanity mirror that was the exact right width and had multiple light brightness and warmth options, and some grass wall panels to add a pop of green and cover the height of the closet wall that I wasn’t going to be able to cover any other way.
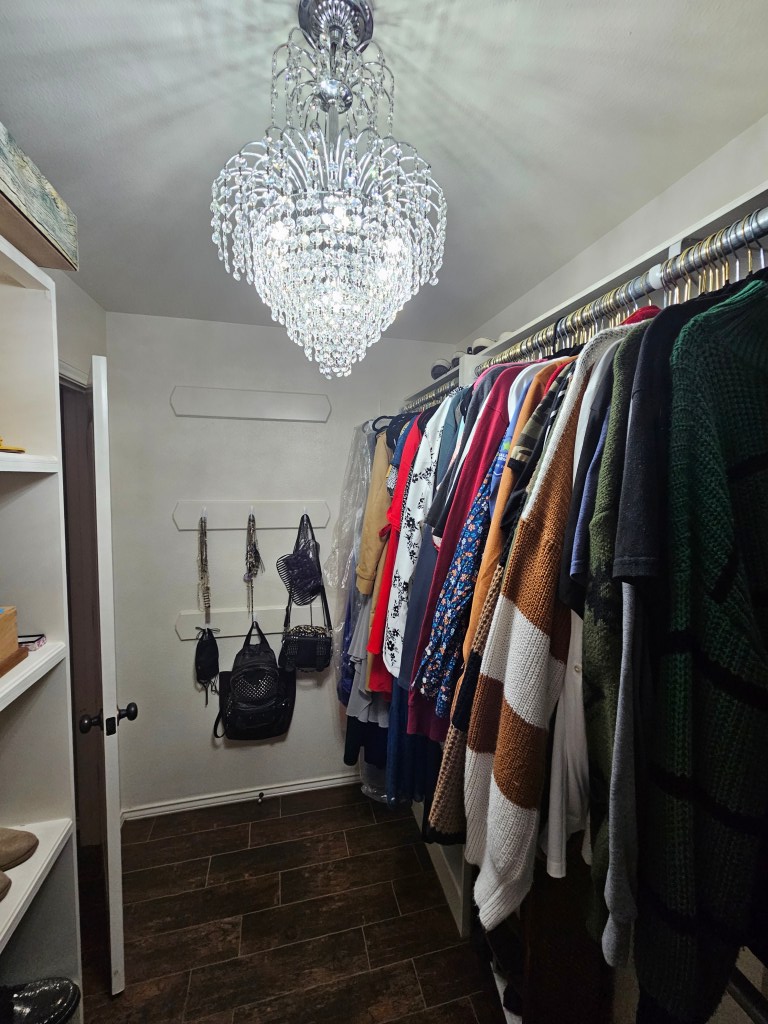
The finishing touches to this closet were, a laundry basket small enough to fit in the space between the dresser and the wall, a rug to add more of the black & white mood to the space, and small plastic displays to hold the few clutches I own and keep them visually accessible.
Once all the decisions were made- I pressed “purchase” on my cart (heart eyes).
STEP THREE | Cleaning, Organizing, and Decorating:
As I waited for everything to arrive, I started in on the next step, which is ESSENTIAL to ensuring a made-over space actually feels new and cozy and as exited as you imagine in your mind- cleaning.
I took every single item out of my closet, hanging, folded, thrown, it didn’t matter- it was removed from the closet and taken to another room. Once the closet was emptied and a blank slate, I cleaned every single surface.
Once items started arriving, I set them up as they came in the mail. The first thing to arrive was the dresser. It took a few hours to assemble, but it was ultimately simple to put together and darn-good quality. I assembled it inside the closet and in hindsight, wish I had assembled it in the bedroom and pushed it inside after. I pushed that into place, and filled it with one category of item per drawer, neatly folded and easy to find.
When the baskets came in, I filled them and placed them on top of the dresser. My formal gowns went each inside a dress bag, put onto a uniform hanger, and hung, and every single article of hanging clothes I removed from the old hanger, put inside a uniform hanger and hung in order of season and size.
The most time consuming was hanging up the wallpaper, some pieces were larger than the cubby or area I was sticking it to (I also put it on trim in various spaces in the closet), so I used a straight razor wallpaper kit that I found on Amazon. The blade came loose from the handle a couple times, but it was really sturdy and did a great job.
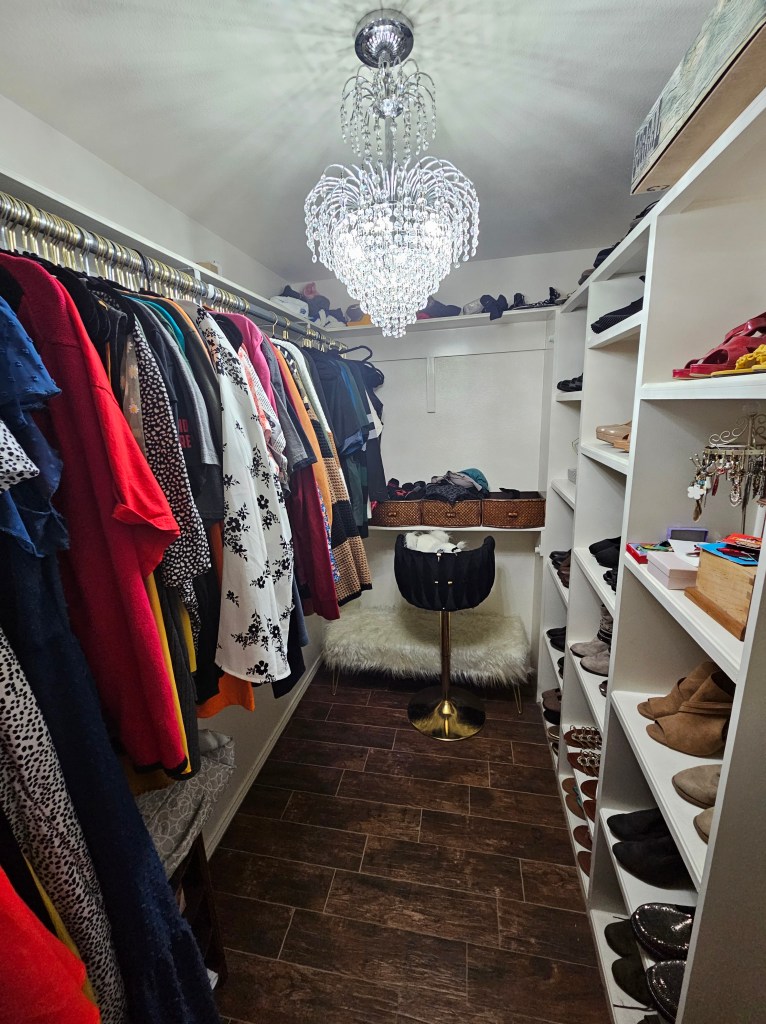
Once the wallpaper was up I put my shoes (2 pairs each) in cubbies. To make this as beautiful as possible, I tried to put similar shoes together, so neutral heels next to other neutral heels, boots next to boots, black heels next to black heels, etc.- you get the picture. The shoes that were more worn, flats, and tennis shoes I setup on the very top shelf of the closet, slanted so I could see them well enough to choose them when needed.
I then assembled and setup my jewelry display pieces and organized everything onto them. What I loved the most about this is that not only did it help with the organization and ease-of-use of my closet space, but it also made my jewelry a decorative item for the closet.

I installed the mirror prior to laying the rug, as the install required drilling, which got sawdust everywhere that I cleaned back up and mopped again before laying the rug.

Last was the most exciting part- the biggest change yet. The wall opposite the closet that I was turning into a vanity area. I already owned a white fluffy bench that I had migrated into the closet when I no longer needed it another room. I put that against the wall- It would make a good foot rest for the barstool that I also happened to already have. I had purchased a set of 4 barstools for my very tall kitchen island, and I only needed 3 for the kitchen- so I moved the last one into the closet and serendipitously- it was the perfect height to use the shelf as a counter for the vanity.
I placed a green laundry basket in the space where the bench ended and the wall was. After adding wallpaper to the trim of this area of the closet, I used thumbtacks to hang 3 panels of a grass wall right under the trim. Meeting the bottom of the grass wall was a vanity mirror. The mirror has 3 different bulb warmth’s to choose from and can dim and brighten in any of the 3 warmth’s.
I added my makeup organizer and put all my loose makeup in it. Placed an eye mirror that I had received as a gift from a friend and put my clutches on the plastic displays above the whole area, slanted to all fit and look decorative.

The pink box that my costume pieces were in went in the left corner, caddy-corner, and a small faux plant in the right corner.
This completed the entire closet and it turned out absolutely beautiful. As I get more comfortable with wallpaper, colors and patterns during my journey of learning interior design just through doing it- this has been my favorite home project to date!

I hope that this inspires your own project! Happy decorating!

Leave a comment